Create a Facebook Pixel
This article will guide you through the steps required to create a Facebook Pixel.
What is Facebook Pixel?
A Facebook Pixel is a piece of code that can be added to your website to collect data about your visitors and track the actions they take on your website.
Once the Facebook Pixel has been set up on your website, it will fire every time someone takes a specific desirable action, eg. visits a certain page, adds an item to their shopping cart or makes a purchase.
The completed actions can be viewed on your Facebook Pixel page in Events Manager, where you’re able to optimise ads, create lookalike audiences and retarget audiences.
Follow the steps below to create a Facebook Pixel.
NOTE:
The simplest way to add a Facebook Pixel to your website is to add UP Digital Marketing to your Facebook Business Manager with restricted access by following the steps in this guide: https://updigitalmarketing.com.au/grant-access-to-your-facebook-ad-account
Once added, we will set up your Pixel and create the custom conversions that you need.
Alternatively, follow the steps below to create a Facebook Pixel yourself and send the details to UP Digital Marketing to add to your website.
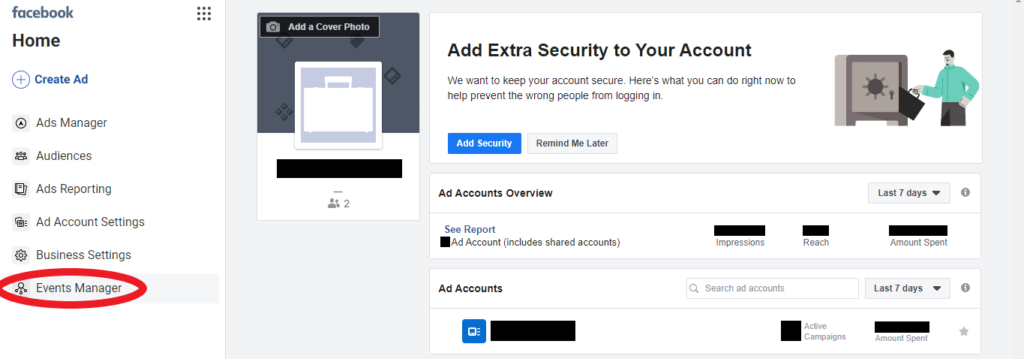
- Visit business.facebook.com and log in to your Business Manager account.
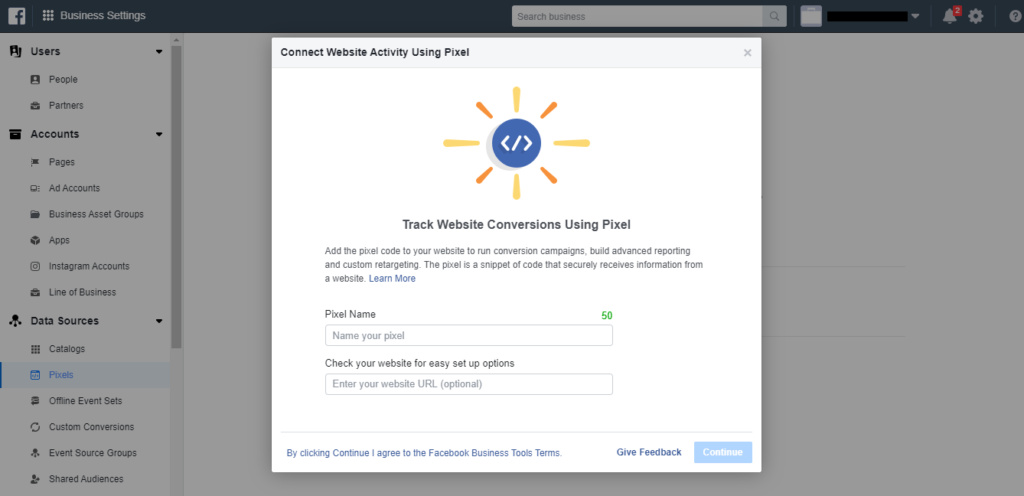
Note: If this is your first time using Facebook Business Manager, follow the steps in this article to create and set up your Business Manager account: https://updigitalmarketing.com.au/create-your-facebook-business-manager-account - Navigate to “Business Settings” → “Data Sources” → “Pixels” and “Add” a new Pixel.


- Name your Pixel.
Your Pixel name can be anything but generally stick to your business name or domain address.
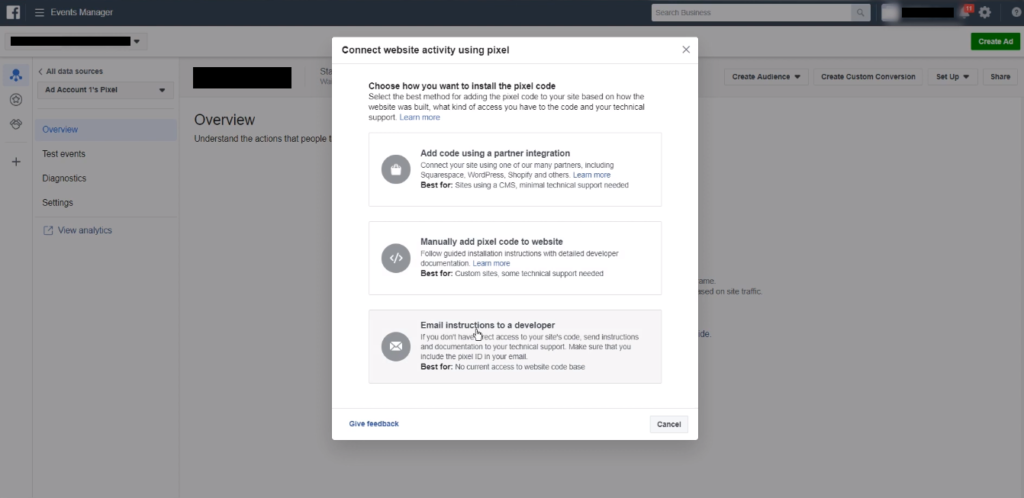
- Choose how you’d like to install the code onto your website.
NOTE: We recommend emailing instructions to us at [email protected] or to your website developer to add the code to your website.
Alternatively, if you have access to your website backend, you can add the code yourself through an integration or adding the code manually.
- Once the code has been sent to us, we will install it onto your website and update you when complete.
NOTE: we will need access to your website backend if we will be installing.
Alternatively, we can guide you through the process while screen sharing - To check that the Pixel has been installed correctly, download and install the Facebook Pixel Helper extension from the Chrome Store, navigate to your website and ensure the extension finds an active Pixel.
- You can take your Pixel a step further by setting up Custom Conversions which trigger every time a user makes a desired action that you specify.
This can be very powerful when combined with custom audiences and retargeting ads.
A Facebook Pixel is a piece of code that can be added to your website to collect data about your visitors and track the actions they take on your website.
Once the Facebook Pixel has been set up on your website, it will fire every time someone takes a specific desirable action, eg. visits a certain page, adds an item to their shopping cart or makes a purchase.
The completed actions can be viewed on your Facebook Pixel page in Events Manager, where you’re able to optimise ads, create lookalike audiences and retarget audiences.
Follow the steps below to create a Facebook Pixel.
NOTE:
The simplest way to add a Facebook Pixel to your website is to add UP Digital Marketing to your Facebook Business Manager with restricted access by following the steps in this guide: https://updigitalmarketing.com.au/grant-access-to-your-facebook-ad-account
Once added, we will set up your Pixel and create the custom conversions that you need.
Alternatively, follow the steps below to create a Facebook Pixel yourself and send the details to UP Digital Marketing to add to your website.
- Visit business.facebook.com and log in to your Business Manager account.
Note: If this is your first time using Facebook Business Manager, follow the steps in this article to create and set up your Business Manager account: https://updigitalmarketing.com.au/create-your-facebook-business-manager-account - Navigate to “Business Settings” → “Data Sources” → “Pixels” and “Add” a new Pixel.


- Name your Pixel.
Your Pixel name can be anything but generally stick to your business name or domain address.
- Choose how you’d like to install the code onto your website.
NOTE: We recommend emailing instructions to us at [email protected] or to your website developer to add the code to your website.
Alternatively, if you have access to your website backend, you can add the code yourself through an integration or adding the code manually.
- Once the code has been sent to us, we will install it onto your website and update you when complete.
NOTE: we will need access to your website backend if we will be installing.
Alternatively, we can guide you through the process while screen sharing - To check that the Pixel has been installed correctly, download and install the Facebook Pixel Helper extension from the Chrome Store, navigate to your website and ensure the extension finds an active Pixel.
- You can take your Pixel a step further by setting up Custom Conversions which trigger every time a user makes a desired action that you specify.
This can be very powerful when combined with custom audiences and retargeting ads.
Other Guides
Create Your Facebook Business Manager Account →
This article will guide you through the steps required to create and set up your Facebook Business Manager Account.
Grant Access to your Facebook Ad Account →
This article will guide you through the steps required to add UP Digital Marketing to your Facebook Ad Account.

