Create Your Facebook Business Manager Account
This article will guide you through the steps required to create and set up your Facebook Business Manager Account.
What is Facebook Business Manager?
Facebook Business Manager is a Facebook tool that sits above the self-service tools such as Pages, Ad Accounts, Finances and Reporting.
It’s designed to reflect an organisational hierarchy where the business administrators have a full suite of access and can allow permissions to specific people who are working on Pages or Ad Accounts.

Follow the steps below to create your Business Manager account:
- Visit business.facebook.com and sign in with your existing Facebook credentials.
- Click the “CREATE ACCOUNT” button to create a new Facebook Business Account
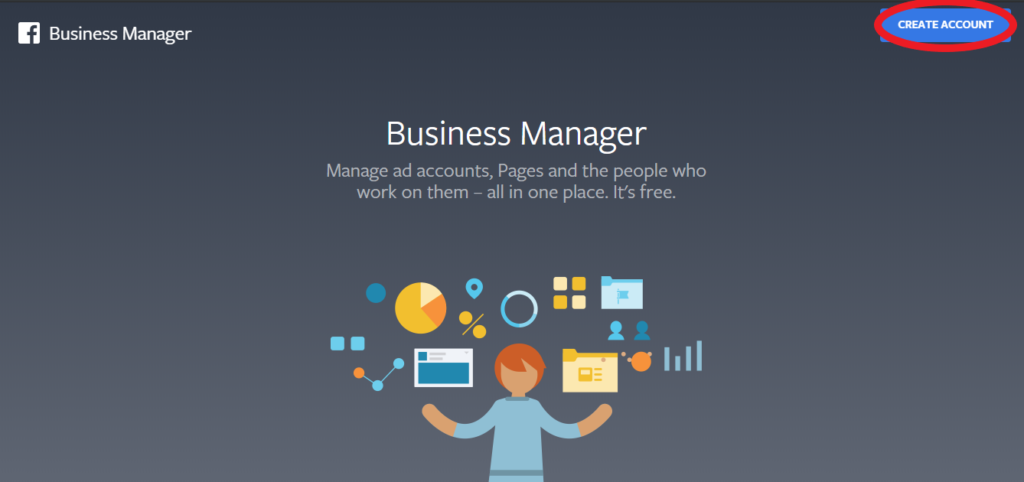
- Follow the guided steps to create your Business Manager account.
Fill out as much details as possible to ensure Facebook sees your business as a legitimate business.
If your business does not have a website, use your Facebook Page URL eg. https://www.facebook.com/updigitalmarketing
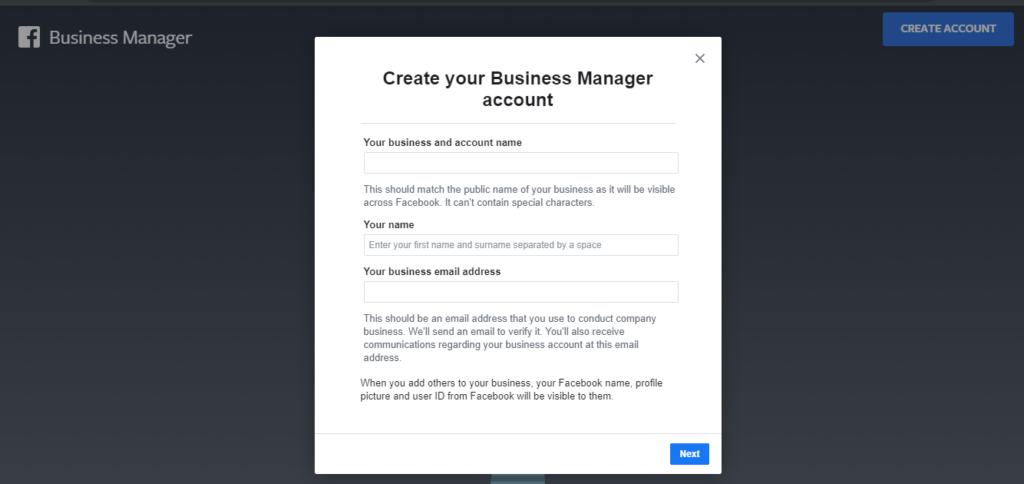
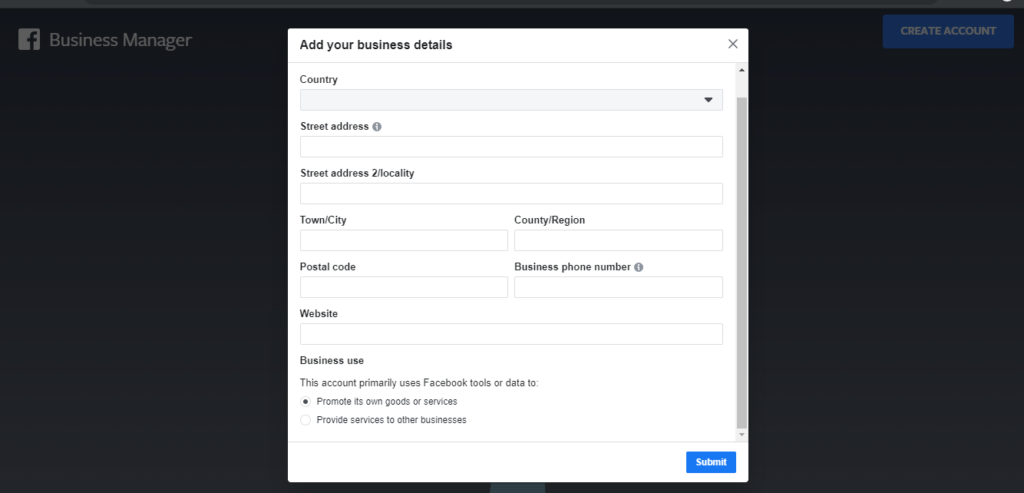
- Verify your email address by clicking the link in the confirmation email sent to you
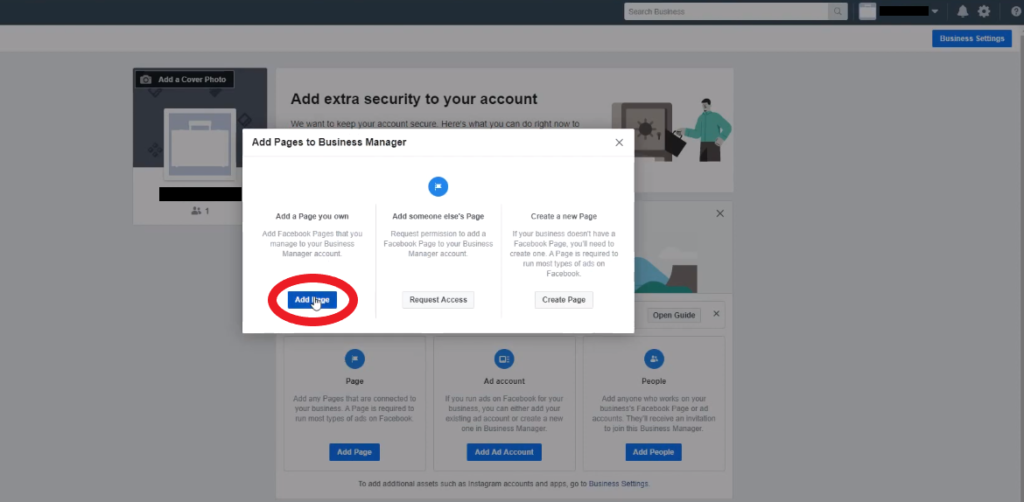
- Add your business’ Facebook Page to your Business Manager.
Click the “Add Page” button and choose whether you want to link an existing Page (you will need to be admin of the page), request access to a page that belongs to your business but you don’t have admin access, or create a new Page.
In this example, we will add a page that you own/you are admin of.
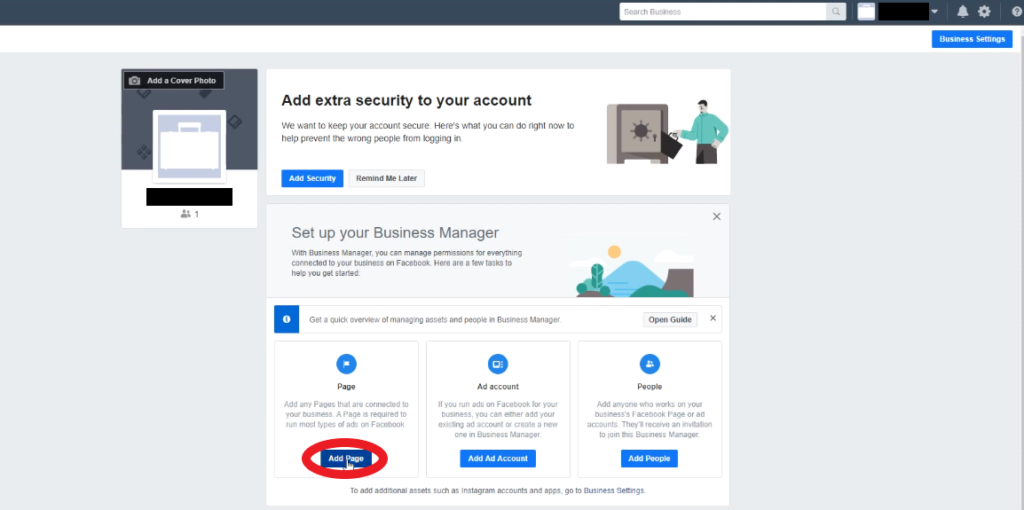
- Once your Page has been successfully connected, you will need to connect an Ad Account.
This will be the Ad Account that UP Digital Marketing will have access to and create your PPC campaigns in.
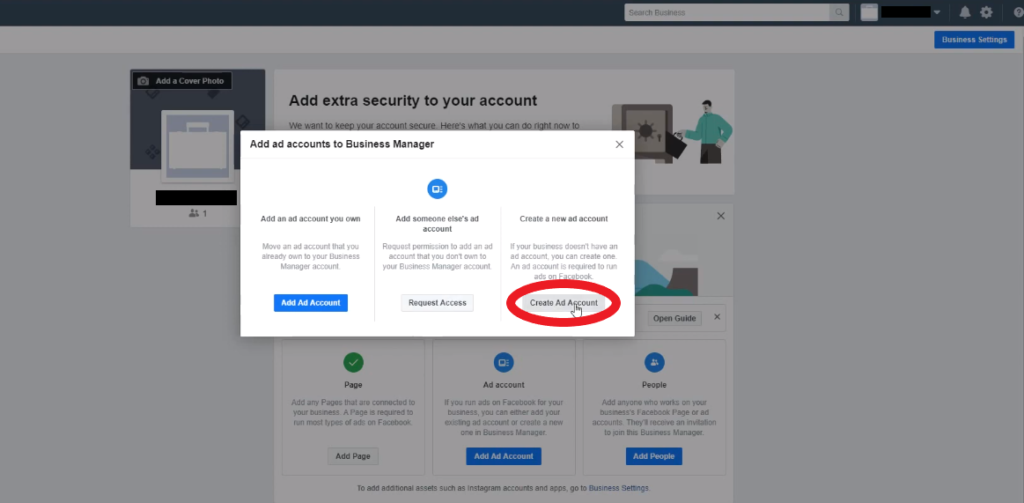
Click the “Add Ad Account” button.
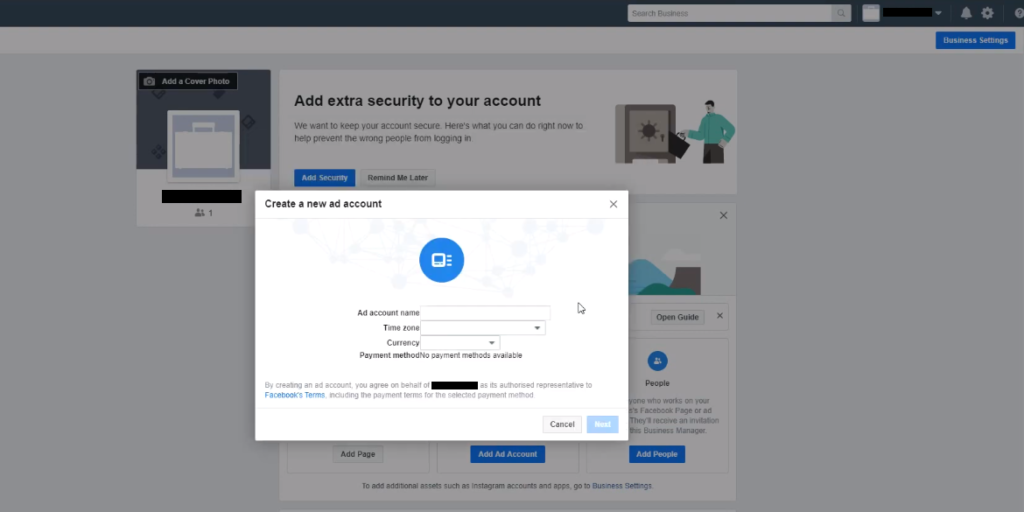
If this is your first time using Business Manager, you will need to create a new Ad Account. If you have already created an Ad Account in the past, you have the option to connect an existing account. For this example, we will be creating a new Ad Account.
Enter your Ad Account Name as your business name.
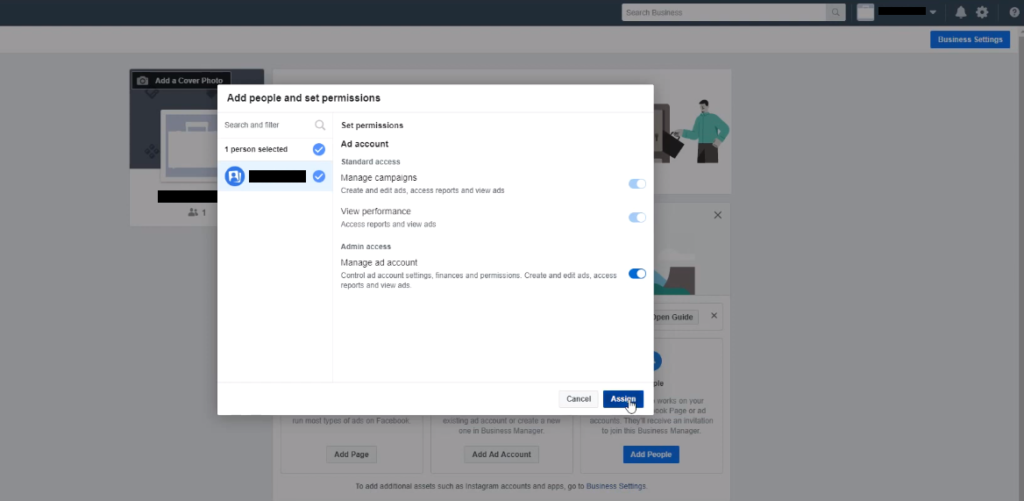
You will then be prompted to add people and permissions to your Ad Account. Select yourself and allow full permissions.
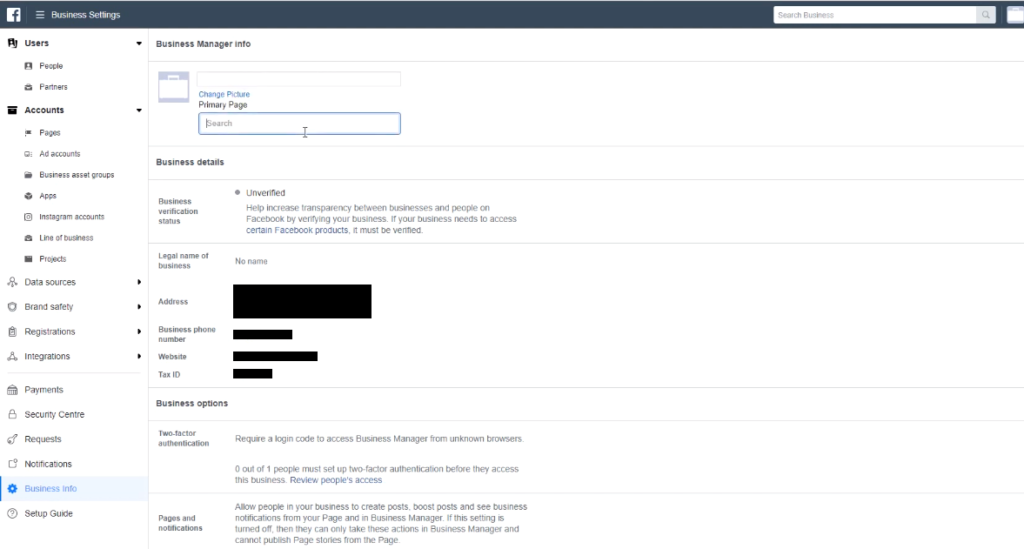
- Choose a primary Page for your Business Manager by navigating to “Business Settings” → “Business Info” → “Edit” next to the Primary Page option and selecting the relevant Page.
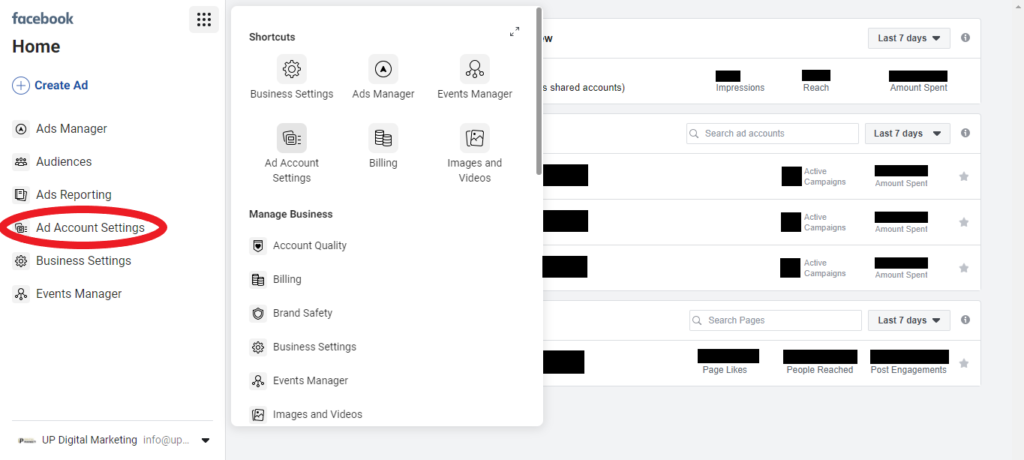
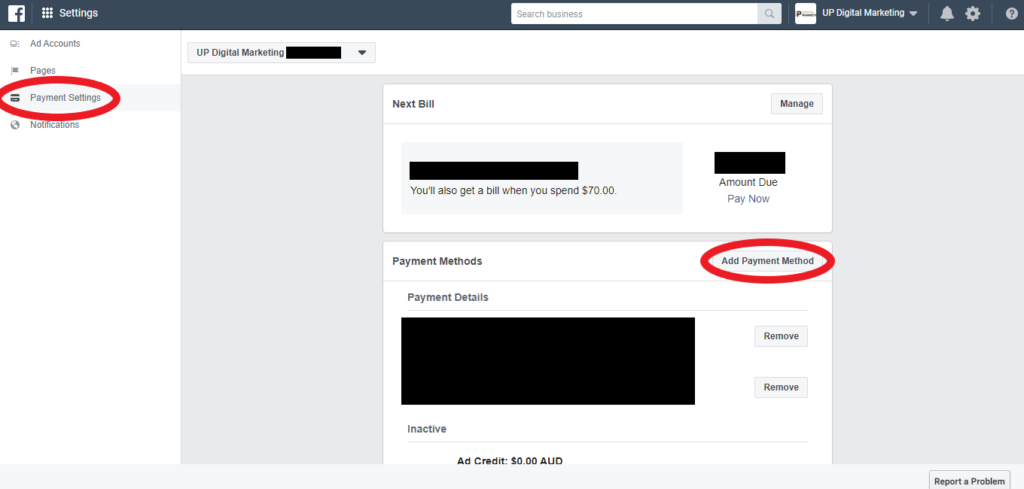
- Add a payment method to your account by navigating to “Ad Account Settings” → “Payment Settings” → “Add Payment Method”.
Note that it’s recommended to add a credit card instead of PayPal.
You may then be prompted to link your payment method to your Ad Account.
The basics of your Business Manager account are now set up!
Spend some time browsing through the tabs and adding any other information you can.
Learn how to grant access to your Facebook Ads Account or create a Facebook Pixel.
Other Guides
Grant Access to your Facebook Ad Account →
This article will guide you through the steps required to add UP Digital Marketing to your Facebook Ad Account.
Create A Facebook Pixel →
This article will guide you through the steps required to create a Facebook Pixel.

